Showing posts with label charity quilt. Show all posts

Wednesday, November 11, 2015

Recent Echoes Quilts

Echoes quilts is a term I use for quilts made from leftover fabrics from earlier quilts. Echoes quilts are donated to charity.

A is for Angela II
Created partly from leftovers of A is for Angela, made a few years ago.
Based on Craftsy class Dot to Dot Quilting. Quilt to be donated to Stanislaus Family Justice Center.
42" square
Completed 9/1/2015

Original A is for Angela
For daughter of coworker Margarita A.
Completed December 2011

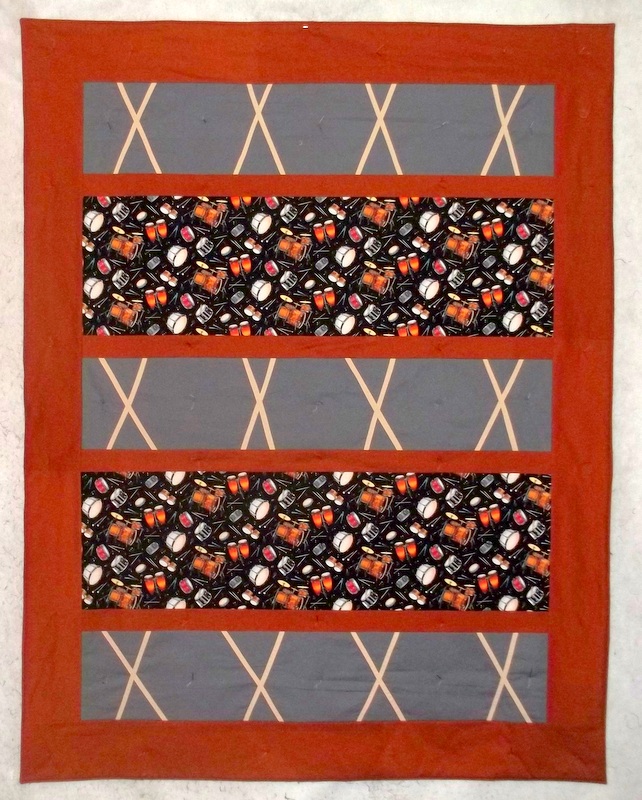
Guitars
Improv quilt created partly from leftovers of Larry, made a few years ago.
Quilt to be donated to local agency.
45" x 60" 
Completed 9/2/2015

Close-up


A few units made from scraps


Larry
For former worship pastor and boss Larry B.
Completed April 2012

Debbie

Quilt Finishes

Here are some quilts I've finished in the past few months.

Sew, How Do You Take Your Tea?
For retiring co-worker Karen L.
Original design
59" square
Completed 7/8/2015

Inspiration ideas provided by Karen: purple, royal blue, mauve, quilts and tea. Karen hopes to learn to quilt, and the quilt's title is a deliberate pun, combining sewing and tea.


Improv - Aqua Room
Pieced improvisationally. Color combo inspiration came from an aqua room seen on Pinterest. Completely from scraps. Free motion quilted. 
20" x 25"

Pieced units, sewn improvisationally, trimmed to workable sizes. I worked with multiples of 5" finished, so my units were trimmed dimensions of 5.5", 10.5", etc. This helps the pieces fit together easily. I recommend Cheryl Arkison's class Improv Quilting Basics at CreativeLive.com, which I enjoyed.


Jeweled Stars
For coworker Becky T.
Inspired by one of her shirts that already looked like a quilt.
Original design
 52" square 
Completed 8/27/2015

Close-up of Becky's shirt, which inspired the quilt. I borrowed the shirt at least once. She knew that I might make a quilt based on it, but she had no idea that the quilt would be for her.


Improv 3
Free form and improv style. Most blocks made during various quilting trips.To be donated to local agency that helps people who have been abused. 
56" square 
Completed 11/8/2015

Some of the blocks above began as units made during quilting trips, I added strips and scraps to make the blocks bigger.

New units made from trimmings and smaller scraps

Debbie

Sunday, June 28, 2015

Red Liberated Quilt

Red Liberated Quilt 
Liberated and Improv style blocks
 Mostly from stash
 48" square
 Completed 6/27/2015
 To be donated to a local agency that helps people who have been abused.

The centers of a few blocks are quite old, perhaps dating back to 2003, my first quilting trip, when I visited my daughter Lisa in San Diego. I kept myself busy sewing at the motel while she was at work. I worked through the book Liberated Quiltmaking. Each block is framed with a narrow black border. Some have an additional border of blue print.

Here's a peek at the back of the quilt. I bought the blue print long ago, for this quilt. There wasn't quite enough to cover the back, so I added another fabric, from stash, to fill the space.

This happens to be the eighth and last of a group of quilts that I call Loaves and Fishes quilts. They were funded, at least in part, by a generous Joann's gift card given to me by a group of friends shortly before Christmas 2014. I call them Loaves and Fishes quilts because I was able to make so many quilts with the card. The term refers to the Bible story of the boy's lunch of bread and fish, which multiplied as the disciples distributed it to a crowd of thousands of people. All were fed, and there were leftovers.

Here are the other seven quilts in the group (all throw sized):
Click! Click! Click! Click!

Lighthouses

Play Ball!

Smiley Faces

A Day at the Beach

Diamonds for Reghan

SF Giants Double Header

Debbie

Wednesday, May 13, 2015

WIP Wednesday - Liberated Quilt Top

Quilt top I finished recently

I started with a group of blocks, some made in Liberated Quiltmaking style, some leftovers from other blocks.

I attached a narrow black border to each to square them up.

To the smaller blocks I added a blue print, which I bought years ago for this project. I intended to use the print as the quilt's border. I figured that adding the print to some of the blocks would make them larger, plus tie the inside of the quilt to the outside.

I added a red border to each block to bring each to a specific size. The red had been in my stash for a few years.

Blocks all sewn together. I liked the bold red background, and decided not to use the blue print as the border. However, I will use the blue print on the back of the quilt, which will tie the back to the front.

I hope to finish the quilt this weekend. The completed quilt will be donated to a local agency that helps abused people.

Debbie

Friday, November 21, 2014

Two Quilts Finished and Delivered

Today I delivered two quilts to Stanislaus Family Justice Center, a local agency that helps people who have been abused. Each child who comes through gets to choose a quilt to keep.

Improv Quilt
Inspired by a color challenge found at The Color Throwdown blog of navy, pale plum and green.
All from stash and scraps
38" square
Original design
Completed 10/24/2014

Close-up
Did a little straight line machine quilting. I usually tie quilts, but I decided to do some machine quilting, after taking the online class Creative Quilting with Your Walking Foot at Craftsy.com. It's not perfect but some child will love the quilt, anyway. The quilt is quite small, also, but I have faith that it will be just right for someone.

Superman Remixed
Turning Twenty style, made largely of leftovers from two previous Superman quilts.
All from stash and scraps.
59" square
Completed 11/21/2014

Close-up
The Superman print with smaller figures is from a quilt I made for my grown son Robbie, a Superman fan since childhood. The print with larger motifs is from a quilt I made for friend Andy D., also a Superman fan.

This is the first Superman quilt, made for my son Robbie in October 2010.

This is the second quilt, made for friend Andy D. in January 2013.

Purposely, I did not repeat any of Robbie's fabrics for Andy's quilt. I wanted each to be unique. But I did combine the fabrics for the charity quilt, and I think they go quite nicely together.

I hope that the Improv Quilt and Superman Remixed will bring a bit of cheer and comfort to the children who choose them.

Debbie

Friday, October 24, 2014

Quilt Top Finished, New Quilt Begun

Tonight I finished the top of the improv quilt.

Pink border ties in nicely with the pink in the center block.

Blue border added to finish the top.

When the quilt is completed, my plan is to donate it to Stanislaus Family Justice Center, which helps victims of abuse. Each child who comes through gets to choose a quilt. This quilt will finish quite small, about 35" square, but I believe that it will be just right for some child in need of comfort.


Meanwhile, I'm starting a new quilt, for the granddaughter of co-worker Patty L. Patty's granddaughter was born on Halloween, and I was asked to make a quilt that combines Halloween and birthday. Patty's granddaughter's favorite color is purple.

I found the fabric on the right at a local store. Cute, rather than scary, I think it's appropriate for a grade school-aged girl. Patty's granddaughter likes cats, and the fabric on the left has black cats. There are cats in the Halloween girl print, as well.

Here are the fabrics that will represent birthday: balloons and cupcakes.

Fabrics for the quilt, including tone-on-tone orange and solid purple

Electric Quilt sketch
Center row is the Halloween girl fabric. Outside pink rows are the cupcake fabric. Remaining rows are squares in alternating balloons (green) and black cats (purple).

The quilt should go quickly.

Debbie

Thursday, October 23, 2014

WIP Wednesday - Improv Quilt

A couple of months ago I started an improv quilt, combining techniques learned in online classes at Craftsy.com, as well as Liberated Quiltmaking. Throughout the process I've tried not to plan too far ahead, dealing with whatever happens as I go.

This is how it looks now.

Please read on to see how I got there.

The idea for the quilt came from a color challenge found in a blog post by The Color Throwdown: navy, pale plum and green. The challenge is actually for cardmaking, but I adapted it to quilting.

I started with less than a yard of this pretty fabric which had been in my stash for many years.

Scraps

I sewed together pairs of strips, then cut them into sections.

Organized

Trying to gauge how many sections would be needed to cover the length of the squarish background piece.

Sewing sections together

One long set of strips

That'll work.

Trimmed up the edges without worrying if they are parallel to each other.

Cut in half

Laid on top of the background. Looks good.

Cut roughly in half

Inserted one strip

Turned the block, then cut in half again.

Trying out the placement of the second strip. I like having the blue area in the center.

Sewn together. Block will be trimmed to size later.

Second block done.

At this point I set the project aside until yesterday.


Made two more blocks similar to the original ones.

Took a squarish background piece, cut it in fourths, and then sewed on triangles in a wonky fashion.

Triangles flipped and pressed

View from the back

Trimmed

View from the front

The points don't match but that's okay.

Inserted pink strips

Trying out a navy print for the center. I like it.

Five blocks done. All will be trimmed later.

There are four spaces that need to be filled. Trying out a French Braid look.

Flipped and pressed
This is where I ran into problems. I couldn't figure out how to make the braid without leaving an exposed edge. I spent about an hour trying out different ideas, without success. Finally I ditched all four blocks in this partially made state. They are now in the scrap bag, destined for Binky Patrol at some future date. Bye-bye!

Decided to keep things simple. I liked the idea of the on-point navy square in the center of the green background.

Just for kicks, I re-arranged the striped blocks. I liked them better the other way.

Before I started on the green blocks, I measured the five already-finished blocks. They varied in width and height from 9" - 10". I trimmed all five to 9" square.

Five blocks trimmed to size

I had two oblong strips in this mottled navy. I just cut them in half with scissors - no measuring.

I decided to applique the squares to the background. I could have zigzagged over the raw edge, but I chose to press under the edges for a clean finish. Above, two sides pressed under, about 1/8".

All edges pressed under

From the right side

Turned the "square" on point, positioning it roughly in the middle of the 9" square background.

Top-stitched just along the edges.

View from the back

Nine blocks done
The quilt is pretty small, would finish less than 27" square at this point.

Trying out different border fabrics

Blueberry wins.

Still wanted some pink. This one is nice and bright, but it's much bluer than the pink in the center square.

Found a couple of pinks that were more orange. The polka dot is cute, but perhaps too cute.

I chose the solid pink, which is just a little darker than the pink in the center block. I think it will help the design if I repeat the color.

Nine blocks sewn together. What a happy quilt.

Border fabrics with the main quilt top
I like what I see.

As I mentioned before, the quilt will finish up pretty small, even with the additiion of the two borders. I could use it as a wallhanging, but it will end up too wide for the space I have in mind. I've decided to give the finished quilt to Stanislaus Family Justice Center, where some child (probably a girl) will be able to use it for naps, cuddling up, or keeping her dolly warm.

Debbie