Scrappy Trees
For friend and co-worker Holly T., who is moving to Oregon for her husband's work. Holly gave me clues for her quilt ahead of time, which were incorporated into the design: green, brown, purple, trees, rustic, geometric.
Top completely from stash
Original design
59" square
Began 5/20/2015. Completed 5/27/2015.
Close-up
Tree sections were cut in a carefree manner. Each scrappy tree has its own personality.
Electric Quilt Sketch
Fabrics
Green fabrics for the trees. I sorted light to dark, then arranged to get contrast from one fabric to another.
Wide strips stacked. I made two separate stacks for easier cutting.
Aligned the corners
Strips cut into sections. The sets on the far right were too narrow, so I re-did them (see below).
Better
First set
Re-arranged Stack the Deck style
I left the far left stack as it was. For the middle stack, I took the top fabric and placed it on the bottom. Then for the far right stack, I took the top two fabrics and placed them on the bottom. Without much fuss, variety has been created. I did the same for the second set (not shown).
Top sections of the trees, Cut each stack into triangle shapes without measuring.
I love paper piecing. I wanted a more Liberated Quiltmaking look and didn't need an actual pattern printed on the paper. I used pages from an old phone book and cut the pages to the size needed for the section. Then I placed a triangle roughly in the center of the paper base.
I sewed a background fabric to one side of the triangle. I chose light blue because it reminds me of sky, plus it would help the trees to stand out against the dark stripes in the main part of the quilt.
Here's how it looks on the front after pressing.
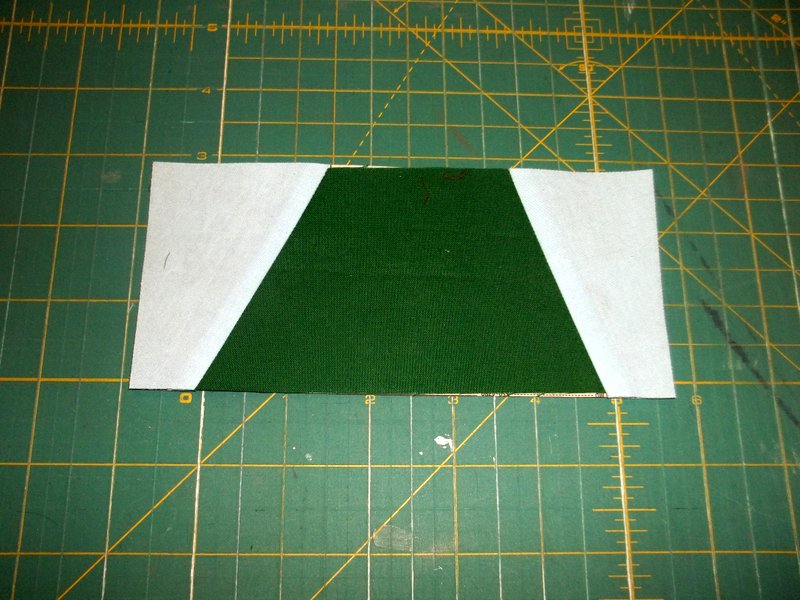
Trimmed the blue to line up with the triangle's edge.
Now I have a nice line to place the other background piece.
Second background piece sewn on
View from the back. I waited to trim all of the sections.
Cuts for the middle sections of trees
Used similar techniques to create the middle sections (bottom)
Lowest section of trees
Again, I used similar techniques. Here are all of the sections for the first tree.
Overlapped, to give an idea of the sewn together sections
Creating the trunk. I did measure the strips for the trunks. I could have made them a little wonky, but decided to do straight trunks to save time.
Finished strip set for the trunks
One section, cut a little longer than needed. I figure I can always trim.
Tree laid out, with sections overlapping
Back of one of the sections, getting ready to trim
I trimmed three sides, leaving one side (the top of the tree) long. Like the trunk, it can be trimmed later.
Top section looks like this
Middle section timmed
Bottom section trimmed
I left the paper on the back of all of the trimmed tree sections, numbering each 1-10, so I would know which ones went together. The trees are scrappy, but they are in a certain order to make sure no two identical fabrics are next to each other in any tree.
Trimmed sections of the first tree laid out
First tree sewn together
Ten trees laid out. I had to figure out how to get variety between the pairs. With 10 trees, I paired them as 1&6, 2&7, 3&8, 4&9, 5&10.
First pair of trees sewn together to form a block
Five pairs done
For the strips I divided greens, browns and purples into two groups. This is the first group (A blocks).
This is the second group (B blocks).
Green strips cut
Taking a strip from each pile, a variety was created.
I repeated with the brown and purple fabrics to create these stacks of strips.
Here is the run of colors for the A blocks.
First A block sewn together. The jagged edge will be trimmed later.
A blocks placed on the design wall
Run of colors for the B blocks
B block placed on the design wall. I didn't like the band of double green strips 4&5 (counting from the top) running across the quilt.
I changed up the run slightly.
I like this better. By the way, I didn't re-sew the original B block. I used it as is, placing it to the left of the trees that can be seen in the photo. The band of double green wouldn't be noticeable with the trees interrupting the flow. Improvising!
I didn't have enough brown, so I substituted in a rust color for a couple of B blocks. It still works.
Blocks laid out on the design wall
Trees block trimmed. My design called for 12.5" (unfinished) blocks. As usual, my striped blocks came up a little short, at 12.25". So, as the late great quilter Mary Ellen Hopkins would recommend, I went with the flow and trimmed all of the blocks to 12.25" (unfinished).
Striped block trimmed
Quilt top completed. I had planned a narrow green border, but decided it was fine without it.
Once again, the finished quilt
I gave the quilt to Holly yesterday, her last day at work. She loves it.
Debbie